Peel and stick carpet tiles are a popular flooring option due to their ease of installation and versatility. Unlike traditional carpet installation methods, peel-and-stick tiles require no adhesives or special tools, making them an attractive option for DIY enthusiasts. With the right preparation and installation techniques, anyone can install peel-and-stick carpet tiles to create a durable and stylish flooring solution for their home or office. In this guide, we will provide step-by-step instructions on how to install peel-and-stick carpet tiles and offer tips for ensuring a successful installation.
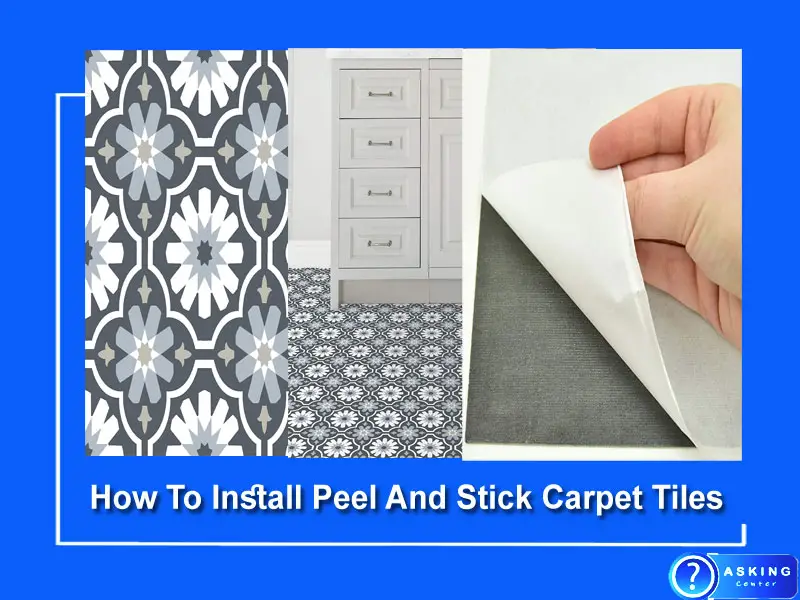
How To Install Peel And Stick Carpet Tiles
Peel and stick carpet tiles are a popular and convenient option for those looking to update their flooring without committing to a permanent installation. They can be easily installed by almost anyone with just a few basic tools and a little bit of patience. In this guide, we will walk you through the step-by-step process of How To Install Peel And Stick Carpet Tiles in your home.
Before you begin installing peel-and-stick carpet tiles, it is important to gather all the necessary materials to ensure a smooth and efficient installation. Here are the materials you will need:
- Peel and stick carpet tiles – be sure to purchase enough tiles to cover the entire area of your room, including extra tiles for mistakes or cuts.
- Measuring tape – to measure the dimensions of your room and the size of the tiles.
- Utility knife or carpet cutter – for cutting the tiles to fit around edges and corners.
- Straight edge or ruler – for making precise cuts.
- Chalk line – to create straight lines on the floor for guidance during installation.
- Floor roller – to smooth out the tiles and ensure they are firmly in place.
- Adhesive remover – to remove any residual adhesive from the floor before installation.
- Broom and dustpan – to clean the floor before installation.
- Optional: underlayment – to add extra cushion and insulation to the floor.
Step 1: Gather Materials
Before you begin your project, it’s important to gather all of the necessary materials. Here’s a list of what you’ll need:
- Peel and stick carpet tiles
- Measuring tape
- Utility knife
- Straight edge or ruler
- Chalk or marker
- Broom or vacuum
- Trowel or roller (optional)
Step 2: Prepare the Floor
The first step in any flooring project is to prepare the surface. Make sure the floor is clean, dry, and free of any debris or loose material. Sweep or vacuum the area thoroughly to remove any dust or dirt that may interfere with the adhesive.
Step 3: Measure and Mark the Area
Measure the length and width of the room and divide the total square footage by the size of the carpet tiles you have purchased. This will give you an estimate of how many tiles you will need. It’s always a good idea to order a few extra tiles just in case.
Use your chalk or marker to mark the center point of the room. Then, use your measuring tape and straight edge to draw a line from the center point to the walls on all four sides. This will create a grid pattern that you can use to lay out the tiles.
Step 4: Lay Out the Tiles
Begin laying out the tiles from the center of the room, working your way out towards the walls. Peel the backing off the first tile and place it in the center of the room, aligning it with the grid lines you marked in Step 3.
Continue laying out the tiles one at a time, making sure to align them with the grid lines and the adjacent tiles. Use your straight edge or ruler to ensure that each tile is perfectly aligned with the others.
Step 5: Cut the Tiles
When you reach the edges of the room, you will need to cut the tiles to fit. Measure the space between the last full tile and the wall and mark the measurement on a tile. Use your straight edge and utility knife to cut the tile along the marked line.
Repeat this process for all of the tiles that need to be cut. For best results, cut the tiles one at a time to ensure a precise fit.
Step 6: Finish the Edges
To finish the edges of the room, you may need to install transition strips or baseboards. These can be installed using a hammer and nails or a construction adhesive.
Step 7: Roll or Trowel the Tiles
If you have a roller or trowel, you can use it to press the tiles firmly into place. This will help to ensure a strong bond between the tiles and the floor.
Step 8: Enjoy Your New Carpet Tiles
Congratulations! You have successfully installed peel-and-stick carpet tiles in your home. Take a step back and admire your handiwork. You now have a beautiful new floor that is both functional and stylish.
In conclusion, installing peel-and-stick carpet tiles is a simple and straightforward process that can be completed by almost anyone. By following the steps outlined above, you can have a new floor in just a few hours. With proper care and maintenance, your new carpet tiles will provide years of comfort and enjoyment.
How To Install Peel And Stick Carpet Tiles On Concrete
Installing peel-and-stick carpet tiles on concrete is a relatively easy process that can add comfort, style, and soundproofing to any room. First, make sure the surface of your concrete floor is clean and dry. Remove any existing adhesive residue with a scraper or putty knife before placing the tiles onto the floor.
To install each tile, simply remove its backing paper and press it firmly into place using your hands or a rolling pin. When you are done laying all of the tiles, seal them with an acrylic sealer to protect against spills and wear and tear.
How To Install Carpet Tiles Without Glue
Carpet tiles are a great way to update the look of any room, but you don’t have to use glue in order to install them. There are several different types of carpet tiles that come with adhesive backing and interlocking edges which allows them to stay in place without the need for glue.
This type of installation is much easier than traditional methods since no special tools or techniques are required and you can easily replace individual tiles if they become damaged.
How To Install Carpet Tiles on Concrete
One of the easiest ways to install carpet tiles on concrete is by using double-sided adhesive tape or mastic glue. First, you’ll need to clean and prep your concrete surface for installation. Once that’s done, apply a thin layer of adhesive onto the concrete and then carefully place each tile in its desired location.
Make sure to press down firmly so that it sticks properly and wait at least 24 hours before walking on it.
Peel And Stick Carpet Tiles With Padding
Peel-and-stick carpet tiles with padding are a great way to upgrade the look of any room in your home. They come in a variety of colors, textures, patterns, and sizes so you can find something that matches the style of your space perfectly. Not only do they look good but they also provide superior comfort thanks to their built-in cushioning layer.
Peel and stick carpet tiles with padding make installation quick and easy while providing extra insulation against sound and temperature changes – making them ideal for both residential and commercial applications!
How To Install Carpet Tiles on Plywood
Carpet tiles are a great way to update your flooring and can be installed on plywood for an easy DIY project. To begin, make sure the plywood surface is clean and free from dust. Next, apply adhesive tape around the edges of the plywood to provide extra security for the carpet tiles.
Then place your carpet tile pieces in a staggered pattern across your plywood floor, making sure that each piece is securely adhered to before moving on to another one. Once all of your tiles have been properly placed, use a rolling pin or weighted object to press down any air bubbles that may have formed during installation. With these simple steps, you’ll soon have beautiful new carpet tile floors!
How To Cut Carpet Tiles
Cutting carpet tiles is a simple and straightforward process that can be done with just a few basic tools. Start by measuring the area you want to cover, then lay out the carpet tile so it covers the entire space. Once you’ve identified where each tile needs to go, use a sharp utility knife or scissors to cut them into shape.
For more precise cuts, an electric carpet cutter can be used for cleaner edges. When cutting multiple pieces of carpet at once, make sure to measure twice before making any cuts – this will help ensure accuracy and avoid having to redo any work!
Underlay for Carpet Tiles on Concrete
Carpet tiles can be installed directly onto concrete floors with the use of an underlay. It is important to use a suitable material for the underlay, as this will not only provide cushioning and comfort but also help reduce noise from footsteps, make vacuuming easier, and even extend the life of your carpet tile flooring. Underlay should always be laid in one single layer before installing carpet tiles on a concrete surface to ensure that it gets adequate protection against moisture and wear.
Carpet Tile Installation Methods
Carpet tiles are a great way to add style and comfort to any room, but it’s important to understand the various installation methods available before you begin. Depending on your needs, there are two main carpet tile installation methods: glue-down and floating. Glue-down is more permanent and provides superior sound insulation while floating installations can be easily removed and replaced in the future if necessary.
Both methods require precision cutting of the tiles for an aesthetically pleasing finish, so it’s best to leave this job up to professionals with experience in carpet tile installation.
How Do You Prepare a Floor for Carpet Tiles?
To prepare a floor for carpet tiles, several steps must be taken:
• Remove any existing flooring.
• Fill in any cracks or holes with a polymer-based patching compound and sand the surface smoothly.
• Vacuum the entire area to remove dust and debris.
• Apply primer if necessary per manufacturer’s instructions. • Lay down adhesive evenly across the floor following the manufacturer’s instructions.
• Place carpet tiles over the adhesive, press firmly into place and check for the evenness of tile placement.
Once completed, your floor is ready for use!
How Do You Prepare a Floor for Peel And Stick Tile?
To prepare a floor for peel-and-stick tile, follow these steps: * Thoroughly clean the surface. * Fill in any cracks or gaps with an appropriate filler.
* Sand the entire surface to create a smooth finish. * Vacuum away dust particles from sanding before continuing. * Wipe down the area with a damp cloth to remove any residue.
Finally, ensure that your floor is completely dry before applying peel-and-stick tiles.
Conclusion
Installing peel-and-stick carpet tiles is a great way to get the look of traditional carpets without all the hassle. Not only are they easy to install, but they also come in a variety of styles, shapes, and sizes that can suit any space. With careful planning and preparation, you can easily transform your home with these affordable and stylish carpet tiles.