Vinyl peel and stick plank flooring is a popular and affordable flooring option that can add a fresh look to any room in your home. It’s easy to install, even for those with little to no experience in home improvement. In this guide, we’ll walk you through the steps to properly install vinyl peel and stick plank flooring, so you can have a beautiful and durable new floor in no time. Whether you’re renovating a kitchen, bathroom, or any other room, this guide will provide you with the information you need to get the job done right.
How To Install Vinyl Peel And Stick Plank Flooring | 6 Easy Steps
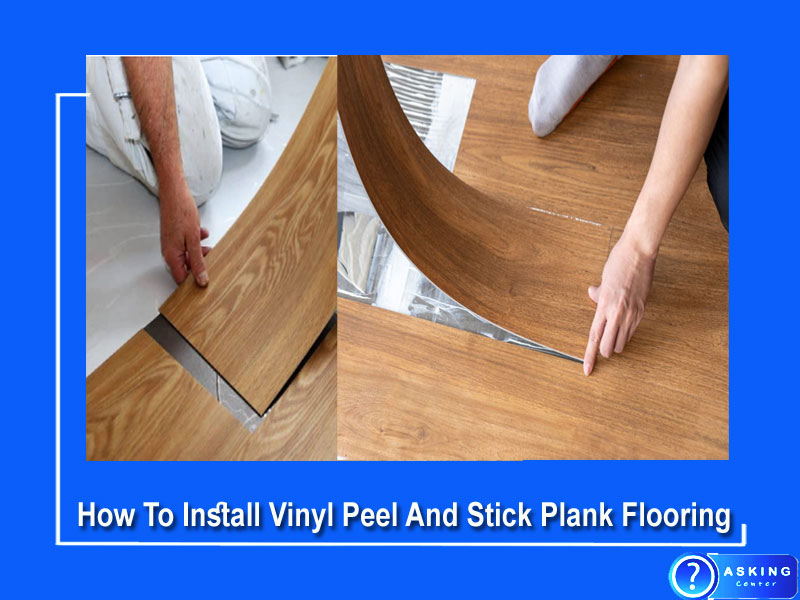
Installing vinyl peel and stick plank flooring is a great way to give your room a fresh, new look. It is also an affordable and easy-to-install option, even for those with little to no experience in home improvement.
To install vinyl peel and stick plank flooring, you’ll need the following materials:
- Vinyl peel and stick plank flooring
- Measuring tape
- Utility knife or vinyl cutter
- Straight edge or ruler
- Floor primer (if installing over concrete)
- Floor leveler (if the subfloor is not level)
- Floor adhesive (if recommended by the manufacturer)
- Rolling pin or floor roller
- Thresholds or transition strips (if transitioning between rooms or to other flooring types)
- Safety glasses and gloves (recommended)
It’s important to ensure that you have all the necessary materials before starting the installation process to ensure a smooth and successful project.
Here’s a step-by-step guide to help you How To Install Vinyl Peel And Stick Plank Flooring.
Step 1: Prepare the Subfloor
Before installing the vinyl plank flooring, you need to ensure that the subfloor is clean, dry, and level. If you are installing over a concrete subfloor, you may need to apply a floor primer to ensure that the adhesive sticks properly. If the subfloor is not level, you may need to apply a floor leveler to even out any low spots.
Step 2: Measure and Cut the Planks
Measure the width of the room and divide it by the width of the plank. This will give you the number of planks needed for each row. Make sure to account for any doorways or other obstacles in the room.
Next, measure the length of the room and add a few inches to account for trimming. Use a straight edge or ruler to mark the plank and cut it to size using a utility knife or vinyl cutter. Repeat this process for each plank, making sure to measure and cut carefully to avoid any mistakes.
Step 3: Lay the First Row
Start laying the planks from the longest wall in the room. Lay the first plank in the corner of the room, making sure to leave a ¼-inch gap between the plank and the wall. This will allow the flooring to expand and contract with changes in temperature and humidity.
Continue laying the first row of planks, making sure to stagger the seams between the planks. Use a rolling pin or floor roller to ensure that each plank is securely attached to the subfloor.
Step 4: Lay the Remaining Rows
Once the first row is in place, start laying the second row of planks. Stagger the seams between the planks to create a natural-looking pattern. Make sure to use a rolling pin or floor roller to ensure that each plank is securely attached to the subfloor.
Continue laying the remaining rows of planks, working your way across the room. As you reach the end of each row, measure and cut the last plank to fit the remaining space. Again, make sure to leave a ¼-inch gap between the plank and the wall.
Step 5: Install Thresholds or Transition Strips
If you are transitioning between rooms or to other flooring types, you may need to install thresholds or transition strips. These can be purchased at any home improvement store and come in a variety of styles and colors to match your new vinyl plank flooring.
Step 6: Finishing Touches
Once all the planks are in place, use a floor roller to ensure that the planks are securely attached to the subfloor. Trim any excess vinyl using a utility knife or vinyl cutter, and then install baseboards or quarter-round molding around the perimeter of the room to cover the gaps between the planks and the wall.
Cleaning and Maintenance
To keep your new vinyl plank flooring looking its best, it’s important to clean it regularly. Use a broom or vacuum to remove any dirt or debris, and then use a damp mop to clean the flooring with a mild detergent and warm water. Avoid using abrasive cleaners or harsh chemicals, as these can damage the vinyl.
How To Install Peel And Stick Vinyl Plank Flooring On Wood Subfloor
Installing peel and stick vinyl plank flooring on a wood subfloor is a straightforward process that can be completed in just a few hours. Here are the step-by-step instructions to help you get started.
Step 1: Prepare the Subfloor
Before installing the vinyl plank flooring, ensure that the wood subfloor is clean, dry, and level. Remove any carpet, padding, or other flooring materials, and then sweep or vacuum the subfloor to remove any debris. If the subfloor is not level, use a floor leveler to even out any low spots.
Step 2: Acclimate the Flooring
Acclimate the vinyl plank flooring in the room where it will be installed for at least 48 hours prior to installation. This will allow the planks to adjust to the temperature and humidity of the room, which will help prevent gaps and buckling later on.
Step 3: Measure and Cut the Planks
Measure the width of the room and divide it by the width of the plank. This will give you the number of planks needed for each row. Make sure to account for any doorways or other obstacles in the room.
Next, measure the length of the room and add a few inches to account for trimming. Use a straight edge or ruler to mark the plank and cut it to size using a utility knife or vinyl cutter. Repeat this process for each plank, making sure to measure and cut carefully to avoid any mistakes.
Step 4: Lay the First Row
Start laying the planks from the longest wall in the room. Lay the first plank in the corner of the room, making sure to leave a ¼-inch gap between the plank and the wall. This will allow the flooring to expand and contract with changes in temperature and humidity.
Continue laying the first row of planks, making sure to stagger the seams between the planks. Use a rolling pin or floor roller to ensure that each plank is securely attached to the subfloor.
Step 5: Lay the Remaining Rows
Once the first row is in place, start laying the second row of planks. Stagger the seams between the planks to create a natural-looking pattern. Make sure to use a rolling pin or floor roller to ensure that each plank is securely attached to the subfloor.
Continue laying the remaining rows of planks, working your way across the room. As you reach the end of each row, measure and cut the last plank to fit the remaining space. Again, make sure to leave a ¼-inch gap between the plank and the wall.
Step 6: Install Thresholds or Transition Strips
If you are transitioning between rooms or to other flooring types, you may need to install thresholds or transition strips. These can be purchased at any home improvement store and come in a variety of styles and colors to match your new vinyl plank flooring.
Step 7: Finishing Touches
Once all the planks are in place, use a floor roller to ensure that the planks are securely attached to the subfloor. Trim any excess vinyl using a utility knife or vinyl cutter, and then install baseboards or quarter-round molding around the perimeter of the room to cover the gaps between the planks and the wall.
Cleaning and Maintenance
To keep your new vinyl plank flooring looking its best, it’s important to clean it regularly. Use a broom or vacuum to remove any dirt or debris, and then use a damp mop to clean the flooring with mild detergent and warm water. Avoid using abrasive cleaners or harsh chemicals, as these can damage the vinyl.
How To Install Peel And Stick Vinyl Plank Flooring On Walls
Installing peel-and-stick vinyl plank flooring on walls is a fun and creative way to add a unique touch to any room. Here are the step-by-step instructions to help you get started.
Step 1: Choose the Right Wall
Choose a wall that is clean, dry, and smooth. Avoid walls that are heavily textured or have significant damage. If necessary, repair any holes or imperfections in the wall before beginning the installation.
Step 2: Measure and Mark the Wall
Measure the height and width of the wall and mark the center point with a pencil. This will help you ensure that the planks are evenly spaced and centered on the wall.
Step 3: Cut the Planks to Size
Use a straight edge and a utility knife or vinyl cutter to cut the vinyl planks to the desired size. Make sure to measure carefully to avoid any mistakes.
Step 4: Apply Adhesive
Apply adhesive to the back of the first plank using a trowel or putty knife. Be sure to apply enough adhesive to ensure that the plank adheres properly to the wall.
Step 5: Install the First Plank
Starting at the center point of the wall, press the first plank into place, making sure to align it with the marks on the wall. Use a level to ensure that the plank is straight and level. Press the plank firmly into the wall, making sure that it adheres properly.
Step 6: Install the Remaining Planks
Continue installing the remaining planks, working your way out from the center of the wall. Stagger the seams between the planks to create a natural-looking pattern.
Step 7: Trim the Planks
Once all the planks are in place, use a utility knife or vinyl cutter to trim any excess material from the edges of the wall.
Step 8: Finishing Touches
Install baseboards or molding around the perimeter of the wall to cover any gaps between the planks and the wall.
Cleaning and Maintenance
To keep your new vinyl plank wall looking its best, it’s important to clean it regularly. Use a soft brush or damp cloth to remove any dust or debris, and then use mild detergent and warm water to clean the wall. Avoid using abrasive cleaners or harsh chemicals, as these can damage the vinyl.
How To Install Peel And Stick Vinyl Plank Flooring In Bathroom
Installing peel-and-stick vinyl plank flooring in a bathroom is a great way to update the space without the need for extensive renovations. Here are the step-by-step instructions to help you install your new flooring.
Step 1: Prepare the Subfloor
Ensure that the bathroom floor is clean, dry, and free of any debris. If necessary, remove any existing flooring and clean the subfloor thoroughly. If the subfloor is not level, use a self-leveling compound to even out any low spots.
Step 2: Measure the Bathroom
Measure the bathroom to determine how much flooring you will need. Purchase extra flooring to allow for any cutting errors or to replace any damaged planks in the future.
Step 3: Acclimate the Flooring
Allow the flooring to acclimate to the bathroom temperature and humidity for at least 48 hours before installation. This will help prevent any expansion or contraction after installation.
Step 4: Cut the Planks to Size
Use a straight edge and a utility knife or vinyl cutter to cut the vinyl planks to the desired size. Measure carefully and mark the planks before cutting to ensure accuracy.
Step 5: Begin Installation
Starting at one corner of the bathroom, remove the backing from the first plank and press it firmly into place on the subfloor. Use a roller to press the plank down and ensure it adheres properly. Continue installing the planks in a staggered pattern, working your way across the bathroom floor.
Step 6: Trim the Planks
As you approach the edges of the bathroom, use a straight edge and a utility knife or vinyl cutter to trim the planks to size. Make sure to leave a gap of 1/4 inch around the edges of the bathroom to allow for expansion.
Step 7: Install the Final Planks
Once you have installed the majority of the planks, measure and cut the final planks to fit around any obstacles, such as the toilet or sink. Use a jigsaw or circular saw to make these cuts.
Step 8: Install Transition Strips
Install transition strips where the vinyl plank flooring meets other types of flooring in adjacent rooms. This will create a smooth transition between the different flooring materials.
Step 9: Finishing Touches
Install baseboards or molding around the perimeter of the bathroom to cover any gaps between the planks and the wall.
Cleaning and Maintenance
To keep your new vinyl plank bathroom floor looking its best, it’s important to clean it regularly. Use a soft brush or damp cloth to remove any dust or debris, and then use a mild detergent and warm water to clean the floor. Avoid using abrasive cleaners or harsh chemicals, as these can damage the vinyl.
Frequently Asked Questions (FAQs)
What do you put under vinyl peel and stick flooring?
How do you install peel and stick vinyl flooring?
Do you need adhesive for peel and stick vinyl plank flooring?
Is it hard to install peel and stick vinyl flooring?
Conclusion
Installing vinyl peel and stick plank flooring is a simple and affordable way to give your room a new look. By following these step-by-step instructions, you can easily install your new flooring in just a few hours. Remember to prepare the subfloor, measure and cut the planks carefully, stagger the seams between the planks, and use a floor roller to ensure that each plank is securely attached.