Installing a curtain track on a drop ceiling can be a bit more challenging than installing one on a regular ceiling. Drop ceilings are designed to be lightweight and easy to install, which means that they may not be able to support the weight of a heavy curtain track or the curtains themselves. However, with the right tools and techniques, it is possible to install a curtain track on a drop ceiling and enjoy the benefits of beautiful curtains in your home or office space.
In this guide, we will take you through the steps you need to follow How To Install Curtain Track On Drop Ceiling. We will cover everything from the tools you need to the different types of tracks available, and we’ll provide you with some helpful tips to make the process as easy and stress-free as possible. By the end of this guide, you’ll have all the information you need to successfully install a curtain track on your drop ceiling and create a beautiful and functional window treatment.
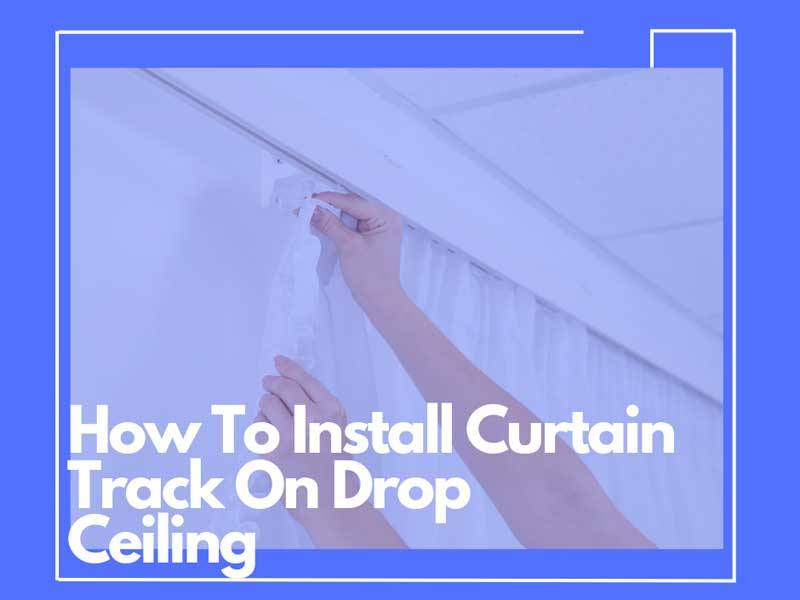
9 Easy Steps To Know How To Install Curtain Track On Drop Ceiling
Installing a curtain track on a drop ceiling requires a few essential ingredients to ensure a successful installation. Here are the tools and materials you’ll need:
Materials needed:
- Drop ceiling track
- Screws
- Drill and drill bits
- Measuring tape
- Pencil
- Ladder or step stool
- Curtains and curtain hooks
Step 1
Measure the length of the drop ceiling where you want to install the curtain track. This will help you determine the length of the track you need to purchase.
Step 2
Locate the support structure of the drop ceiling. This is typically a grid of metal or plastic bars that support the ceiling panels. You’ll need to attach the curtain track to these bars.
Step 3
Mark the location of the screws on the drop ceiling using a pencil. Make sure to measure the distance between the screws and mark them evenly to ensure a level installation.
Step 4
Use a drill and drill bits to create pilot holes for the screws. This will make it easier to attach the track to the ceiling and prevent the ceiling panels from cracking.
Step 5
Attach the track to the drop ceiling using screws. Start at one end of the track and work your way to the other end, making sure to attach the track to every other support bar. If you have a longer track, it may be necessary to install additional support brackets to keep the track level.
Step 6
Once the track is securely attached, you can hang your curtains. Insert the curtain hooks into the track and then attach the curtains to the hooks. Make sure to evenly distribute the weight of the curtains along the track to prevent it from sagging.
Step 7
Test the curtains to make sure they open and close smoothly. If they don’t, you may need to adjust the position of the track or the curtains.
Step 8
Optional – if you want to hide the track, you can install a valance or a ceiling-mounted curtain rod to cover it.
Step 9
Enjoy your new window treatment!
Tips:
Make sure to choose a track that is designed for use on a drop ceiling to ensure it is lightweight and easy to install.
Use screws that are the right length for the thickness of your drop ceiling panels to avoid damaging the ceiling.
Use a ladder or step stool that is stable and secure to avoid accidents while installing the track.
If your curtains are heavy, consider using additional support brackets or a reinforced track to prevent it from sagging over time.
How to Attach a Curtain Room Divider to a Drop Ceiling
Attaching a curtain room divider to a drop ceiling can be a great way to divide a space and add privacy. Here’s how you can do it:
Materials needed:
- Curtain room divider
- Drop ceiling track
- Screws
- Drill and drill bits
- Measuring tape
- Pencil
- Ladder or step stool
Step 1:
Measure the length and width of the space where you want to install the curtain room divider. This will help you determine the size of the divider you need.
Step 2:
Choose a curtain room divider that is the right size and material for your needs. There are many different types of room dividers available, including fabric curtains, beaded curtains, and hanging screens.
Step 3:
Locate the support structure of the drop ceiling. This is typically a grid of metal or plastic bars that support the ceiling panels. You’ll need to attach the curtain track to these bars.
Step 4:
Mark the location of the screws on the drop ceiling using a pencil. Make sure to measure the distance between the screws and mark them evenly to ensure a level installation.
Step 5:
Use a drill and drill bits to create pilot holes for the screws. This will make it easier to attach the track to the ceiling and prevent the ceiling panels from cracking.
Step 6:
Attach the drop ceiling track to the ceiling using screws. Start at one end of the track and work your way to the other end, making sure to attach the track to every other support bar.
Step 7:
Hang the curtain room divider from the track. Depending on the type of room divider you have, you may need to use hooks, rings, or other hardware to attach it to the track.
Step 8:
Test the room divider to make sure it is secure and level. If it sags or hangs unevenly, you may need to adjust the position of the track or the hardware holding the divider.
Step 9:
Enjoy your new room divider! Depending on the material of the divider, it may be necessary to periodically clean or wash it to keep it looking its best.
Tips:
- Make sure to choose a room divider that is the right size and material for your needs.
- A fabric curtain may not provide enough privacy, while a beaded curtain may not provide enough sound insulation.
- Use screws that are the right length for the thickness of your drop ceiling panels to avoid damaging the ceiling.
- Use a ladder or step stool that is stable and secure to avoid accidents while installing the track.
How do you hang curtains on a low ceiling?
If you have a low ceiling, hanging curtains can be a bit of a challenge, but there are a few things you can do to make it work:
Choose the right curtain style: Choose curtains that are not too long and that do not have a lot of excess fabric at the top. This will help to keep the curtains from taking up too much space and making the ceiling appear lower.
Install the curtain rod close to the ceiling: To create the illusion of height, hang your curtain rod as close to the ceiling as possible. This will draw the eye upward and make the ceiling appear higher.
Use long curtains: Even though you want to avoid curtains that are too long, you can still use long curtains that just touch the floor. This will create the illusion of height and make the room feel taller.
Use vertical patterns: Choose curtains with vertical patterns, such as stripes or lines, to create the illusion of height.
Install the curtains outside the window frame: If your windows are close to the ceiling, install your curtains outside the window frame to create the illusion of a higher window and a higher ceiling.
Use tiebacks: Use tiebacks to hold your curtains open and create more space above the window, making the ceiling appear higher.
By following these tips, you can hang curtains on a low ceiling in a way that makes the ceiling appear higher and the room feel more spacious.
How do you install ceiling track curtains?
Installing ceiling track curtains involves several steps. Here’s a guide on how to do it:
Materials needed:
- Ceiling track
- Track brackets
- Screws
- Drill
- Measuring tape
- Pencil
- Curtains or drapes
- Hooks or gliders
Step 1: Measure the length of the space where you want to install the ceiling track curtains. Determine the length of the track that you will need to purchase.
Step 2: Decide on the placement of the track. The track should be installed parallel to the wall, centered above the window or door. Mark the placement with a pencil.
Step 3: Install the brackets for the track. Use the screws provided with the track brackets to attach them to the ceiling. The brackets should be spaced evenly along the length of the track.
Step 4: Install the ceiling track. Snap or screw the track into the brackets.
Step 5: Attach hooks or gliders to the curtains or drapes. Make sure that they are the right size and type for your track.
Step 6: Hang the curtains on the track. Slide the hooks or gliders into the track, making sure they are securely in place.
Step 7: Test the curtains. Make sure that they move smoothly and that they are not catching on any parts of the track or brackets.
Tips:
- Make sure that the track is level before you attach the brackets to the ceiling.
- If you need to cut the track to fit, use a hacksaw or other cutting tool designed for the material of the track.
- Use the right type of hook or glider for your curtains or drapes, as this can affect how smoothly they move along the track.
- If you have multiple panels of curtains or drapes, make sure that they overlap slightly in the middle to prevent gaps where light can come through.
- Consider adding an end stop or other mechanism to keep the curtains from sliding off the track at the end.
Conclusion
Installing a curtain track on a drop ceiling is a relatively simple process that can be accomplished with the right tools and techniques. By following the step-by-step guide we provided, you can easily attach the track to the ceiling, install the brackets, and hang your curtains or drapes. A curtain track on a drop ceiling can be a great way to add privacy and light control to a room, while also enhancing its overall look and feel.
Whether you’re a DIY enthusiast or a professional installer, these instructions can help you achieve a smooth and successful installation of your curtain track on a drop ceiling.
Frequently Asked Questions (FAQs)
Can you put a curtain track on a drop ceiling?
This will ensure that the track and curtains are stable and safe. When installing a curtain track on a drop ceiling, it’s also important to use the right hardware and tools and to follow proper installation procedures to avoid damaging the ceiling or causing any safety hazards.
Can you put a curtain track on the angled ceiling?
Choose the right type of curtain track: Make sure to choose a track that is designed for use on an angled ceiling. Some tracks are adjustable, while others may be fixed at a specific angle.
Determine the angle of the ceiling: Use a level or angle finder to determine the angle of the ceiling where you want to install the track.
Measure the length of the track: Measure the length of the track you will need for the angled section of the ceiling. This may require cutting the track to the appropriate length.
Install brackets at the correct angle: Install the brackets that will support the track at the correct angle to match the angle of the ceiling.
Secure the brackets: Use screws and anchors to secure the brackets to the ceiling, making sure they are level and spaced evenly.
Install the track: Once the brackets are installed, snap or screw the track into place.
Attach curtains or drapes: Attach the curtains or drapes to the track using the appropriate hooks or gliders.
Keep in mind that installing a curtain track on an angled ceiling may require additional tools and expertise, and it’s always a good idea to consult a professional if you’re not sure how to proceed.