Tile Redi shower pans are a cost-effective, easy-to-install solution for replacing your existing shower pan. How To Install a Tile Redi Shower Pan, first mark the area in which you wish to install it using a level and measuring tape. Next, prepare the area by ensuring that all surfaces are clean and free from dirt or debris.
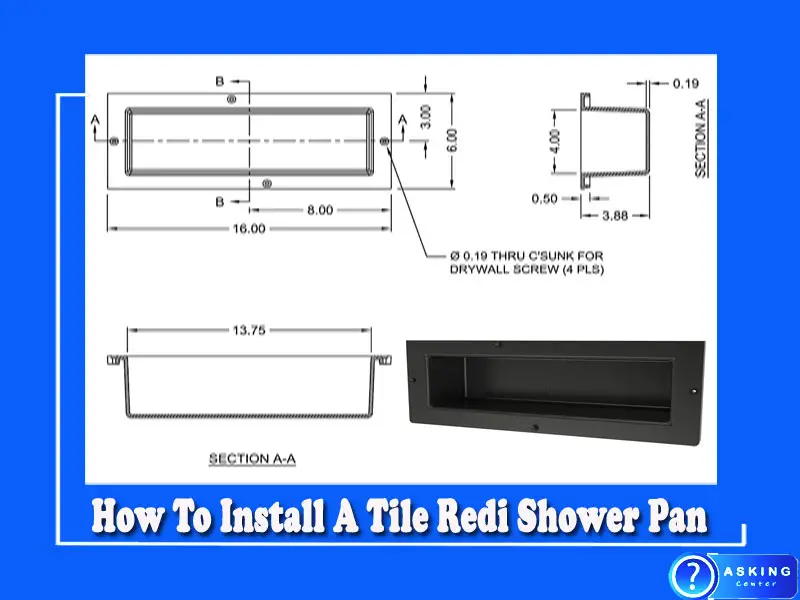
How To Install A Tile Redi Shower Pan
Installing a Tile Redi shower pan can be a complex task, but with careful planning and attention to detail, you can achieve professional results. In this step-by-step guide, we will outline How To Install a Tile Redi Shower Pan, ensuring a sturdy and waterproof foundation for your shower.
Before starting the installation, gather all the necessary tools and materials:
- Tile Redi shower pan
- Level
- Measuring tape
- Thin-set mortar
- Notched trowel
- Waterproofing membrane
- Utility knife
- Silicone caulk
- Rubber mallet
- Sponge
Now, let’s proceed with the installation process:
Step 1: Preparation
- Begin by ensuring that the subfloor is clean, level, and free from any debris.
- Measure the dimensions of the shower area and choose a Tile Redi shower pan that fits the space properly.
- Check the manufacturer’s instructions for any specific requirements or recommendations.
Step 2: Dry-Fitting the Shower Pan
- Place the Tile Redi shower pan in the desired location to check its fit.
- Use a level to ensure that the pan is perfectly level in all directions.
- Make any necessary adjustments to the subfloor or the shower pan’s position to achieve a level surface.
Step 3: Applying Thin-Set Mortar
- Remove the shower pan and apply a layer of thin-set mortar to the subfloor using a notched trowel.
- Spread the mortar evenly, making sure to create ridges for better adhesion.
- Follow the manufacturer’s instructions for the appropriate type and consistency of the thin-set mortar.
Step 4: Placing the Shower Pan
- Carefully place the Tile Redi shower pan onto the layer of thin-set mortar.
- Press down firmly on the pan to ensure proper adhesion.
- Use a rubber mallet to gently tap the shower pan, helping it settle into the mortar.
Step 5: Checking for Level and Adjustments
- Once the shower pan is in place, use a level to confirm that it is still perfectly level.
- Make any necessary adjustments by adding or removing thin-set mortar as needed.
- Take your time with this step, as an uneven shower pan can lead to water pooling and drainage issues.
Step 6: Waterproofing the Shower Pan
- Apply a waterproofing membrane to the entire shower pan surface.
- Cut the membrane to size using a utility knife, ensuring that it overlaps the edges of the shower pan.
- Smooth out the membrane and press it firmly into place, removing any air bubbles or wrinkles.
Step 7: Sealing the Joints
- Apply silicone caulk to all the joints between the shower pan and the walls.
- Smooth out the caulk with a caulk smoothing tool or a damp sponge to create a watertight seal.
- Pay special attention to the corners and edges to prevent any water leakage.
Step 8: Allowing the Installation to Cure
- Follow the manufacturer’s instructions for the recommended curing time of the thin-set mortar and silicone caulk.
- Avoid any foot traffic or excessive weight on the shower pan during this curing period.
- It is crucial to allow ample time for the installation to fully cure before proceeding with the rest of the shower installation.
Once the Tile Redi shower pan installation has cured, you can proceed with the tiling process, connecting the drain, and completing the rest of your shower project. It is essential to consult the manufacturer’s instructions and adhere to any specific guidelines for your particular Tile Redi shower pan model.
By following these step-by-step instructions and taking your time during the installation process, you can ensure a secure and waterproof foundation for your shower. Enjoy the peace of mind and the professional finish that comes
Tile Redi Shower Pan Problems
Tile Redi shower pans are popular for their ease of installation and durability, however, they can present some problems.
The most common issue with Tile Redi pans is cracking or chipping due to improper installation; if not installed correctly, the pan may crack around the drain opening or edges due to excessive weight or pressure. Additionally, water that seeps between the pan and tile lining can cause mold growth in difficult-to-reach places.
It’s important to ensure proper installation of a Tile Redi shower pan as well as regular maintenance and cleaning to avoid these issues.
What Mortar to Use for Tile Redi Shower Pan
When installing Tile Redi shower pans, it is important to use the right type of mortar. For best results, you should use a modified latex thin-set that is designed specifically for bonding tile to plywood or other non-cementitious substrates.
This type of mortar provides strong adhesion and flexibility, which helps seal the seams between tiles and prevents water from seeping through.
Be sure to read the manufacturer’s instructions carefully before beginning your project in order to ensure proper installation.
Can You Use Thinset on Tile Redi Pan
Yes, you can use this set on a Tile Redi Pan. This set is a type of adhesive that bonds tile to the substrate or structure underneath it. When applied correctly, this will provide a strong and reliable bond between the pan and your tiles.
Be sure to follow all manufacturer instructions when using a thin set on a Tile Redi Pan for best results.
Tile Redi Reviews
Tile Redi is an innovative shower pan design that has received rave reviews from homeowners and contractors alike. The product features a patented one-piece, pre-pitched shower pan with an integrated curb, splash walls, and drain; making installation quick and easy. It also comes in dozens of sizes and styles to meet any remodeler’s needs.
Customers praise Tile Redi for its superior quality construction, ease of use during installation, reliable performance over the long term, and excellent customer service.
Tile Redi Base N Bench
Tile Redi Base N Bench is the perfect solution for creating a luxurious shower space without compromising on style. These all-in-one single-piece molded pans provide an easy and reliable installation with no mortar or grout required, making it ideal for DIYers. The unique design offers a built-in bench seat and curb that can be used for storage or seating as well as providing extra safety in your bathroom.
With its waterproof construction, there’s no need to worry about moisture damage, and with its simple yet elegant look, Tile Redi Base N Benches will give any bathroom an updated look.
Tile Redi Shower Pan Flex
Tile Redi Shower Pan Flex is a patented shower pan solution that combines the look of tile with the convenience and durability of a one-piece molded shower pan. It features an integrated flexible membrane waterproofing system to ensure that water stays where it belongs without any additional labor or materials.
The flexible membrane also allows for movement between the substrate and tile, making Tile Redi Shower Pan Flex perfect for use in new construction as well as renovation projects.
Tile Redi Shower Pan Waterproofing
Tile Redi shower pans are an innovative solution for waterproofing a tile shower. The patented one-piece design eliminates the need for traditional mortar bed installation and allows for quick and easy installation.
Furthermore, these shower pans provide superior water protection due to their low threshold height which reduces the risk of flooding, as well as an integrated PVC membrane which provides additional leak protection.
With Tile Redi’s commitment to quality and durability, you can rest assured that your tile shower will remain watertight for years to come!
How Do You Install Redi Tile in a Shower?
Installing Redi tile in a shower requires several steps:
• Make sure the floor is level and clean.
• Place a piece of plastic sheeting to protect against water damage from mortar.
• Spread thin-set mortar over an area with a notched trowel.
• Lay the tiles in place, pressing them into the mortar firmly.
• Cut any tiles as needed to fit around fixtures or corners using wet saws or nippers.
• Allow the tile to set according to manufacturer instructions before grouting and sealing.
Finally, apply sealant along all seams between tiles and fixtures for extra protection against water leaks.
What Kind of Mortar for Tile Ready Shower Pan?
Mortar for tile-ready shower pans should be cement-based mortar specifically designed to bond with glass and ceramic tiles. It is important to use the correct type of mortar in order to ensure lasting hold between the tiles and the substrate.
Here are some key points when installing tile-ready shower pans:
* Use a high-quality polymer-modified thin-set mortar
* Make sure it is rated for exterior use
* Follow the manufacturer’s instructions for proper mixing ratios
* Ensure that all surfaces are clean, dry, and free from grease before applying mortar. By following these steps, you can have a reliable installation that will last many years.
Do You Have to Put Mortar under a Shower Pan?
Yes, mortar is an essential part of the process when installing a shower pan.
Prepare the surface: Make sure the area where you are placing your shower pan is level and clean before applying any material.
Apply mortar: Use a thin-set or mastic to adhere your shower pan to the subfloor.
Spread it evenly with a trowel and fill in any gaps between the floor and wall surfaces.
Seal with caulk: After allowing for proper drying time, use silicone caulk to make sure there are no gaps or cracks that could allow water leakage into other areas of your bathroom.
The combination of these three steps ensures that your new shower pan will be securely installed and create a waterproof seal around its edges so you can enjoy many years of worry-free showers!
Does Tile Go Directly on Shower Pan?
No, tile does not go directly on the shower pan.
To ensure a proper installation and waterproof seal of a tiled shower, the following steps should be taken:
• Install the shower pan and any necessary drainage components.
• Apply an appropriate membrane to the subfloor or joists to provide extra protection against water damage.
• Lay down cement backer board for increased stability and strength of the tiles in place.
• Finally, apply thin-set mortar over the entire area before laying down adhesive-backed tiles in the desired pattern.
Conclusion
Installing a Tile Redi Shower Pan is an easy and cost-effective way to upgrade your bathroom. With its pre-sloped design, it can help make any shower installation easier than ever before. The key is to be sure that you measure correctly and use the right amount of thin-set adhesive when installing the pan.
Following these simple steps will ensure that you have a successful tile shower installation with your new Tile Redi Shower Pan.
Frequently Asked Questions (FAQs)
How do you install a tile shower base?
To install a tile shower base, follow these steps:
Prepare the subfloor: Ensure that the subfloor is clean, level, and free from any debris. Repair any damaged areas and make sure the surface is suitable for tile installation.
Measure and plan: Measure the dimensions of the shower area and select a tile shower base that fits the space properly. Consider the drain location and any necessary adjustments to the plumbing.
Dry-fit the base: Place the tile shower base in the desired location to check its fit. Use a level to ensure it is level in all directions and make any necessary adjustments to the subfloor or the base’s position.
Apply thin-set mortar: Remove the shower base and apply a layer of thin-set mortar to the subfloor using a notched trowel. Spread the mortar evenly, creating ridges for better adhesion.
Place the base: Carefully place the tile shower base onto the layer of thin-set mortar. Press down firmly to ensure proper adhesion. Use a rubber mallet to gently tap the base to help it settle into the mortar.
Check for level and adjustments: Use a level to confirm that the base is still level. Make any necessary adjustments by adding or removing thin-set mortar as needed.
Waterproofing: Apply a waterproofing membrane to the entire shower base surface, ensuring it overlaps the edges of the base. Smooth out the membrane, removing any air bubbles or wrinkles.
Tile installation: Once the base is in place and waterproofed, proceed with the tiling process, following proper tile installation techniques. Be sure to use suitable waterproof grout and seal the grout lines to prevent water penetration.
How do you install a shower floor pan?
Installing a shower floor pan requires careful preparation and following these steps:
Prepare the subfloor: Ensure the subfloor is clean, level, and structurally sound. Repair any damage and make sure the surface is suitable for tile installation.
Measure and plan: Measure the dimensions of the shower area and choose a shower floor pan that fits properly. Consider the drain location and any necessary adjustments to the plumbing.
Dry-fit the pan: Place the shower floor pan in the desired location to check its fit. Ensure it aligns with the drain properly and make any necessary adjustments to the subfloor or the pan’s position.
Apply mortar: Remove the pan and apply a layer of mortar to the subfloor using a notched trowel. Spread the mortar evenly, creating ridges for better adhesion.
Place the pan: Carefully place the shower floor pan onto the layer of mortar. Press down firmly to ensure proper adhesion. Use a rubber mallet to gently tap the pan to help it settle into the mortar.
Check for level and adjustments: Use a level to confirm that the pan is level. Make any necessary adjustments by adding or removing mortar as needed.
Connect the drain: Follow the manufacturer’s instructions to properly connect the drain to the shower pan. Ensure a watertight seal to prevent leaks.
Waterproofing: Apply a waterproofing membrane to the entire shower pan surface, overlapping the edges of the pan. Smooth out the membrane, removing any air bubbles or wrinkles.
Tile installation: Once the pan is in place and waterproofed, proceed with the tiling process, following proper tile installation techniques. Use suitable waterproof grout and seal the grout lines to prevent water penetration.
What kind of mortar for a Tile Redi shower pan?
When installing a Tile Redi shower pan, it is important to use the appropriate type of mortar for a secure and durable installation. The recommended mortar for a Tile Redi shower pan is a polymer-modified thin-set mortar.
Polymer-modified thin-set mortar is specifically designed to provide strong adhesion and flexibility, making it an ideal choice for shower pan installations. The polymer additives in this mortar enhance its bonding properties, ensuring a reliable bond between the shower pan and the subfloor.
This type of mortar also offers improved resistance to water and moisture, which is crucial for a shower environment. It helps to prevent water penetration and ensures the longevity of the installation by protecting against potential damage caused by moisture.
When purchasing the mortar, ensure that it is suitable for use with both the shower pan material and the tile you plan to install. It is essential to follow the manufacturer’s instructions for mixing the mortar to achieve the proper consistency for optimal adhesion and workability.
Always refer to the specific recommendations provided by Tile Redi for the installation of their shower pans. Following their guidelines and using the recommended polymer-modified thin-set mortar will help you achieve a successful and long-lasting installation, providing a sturdy foundation for your tiled shower.
How do you install a tile-ready shower pan with a bench?
Installing a tile-ready shower pan with a bench can provide added functionality and convenience to your shower space.
Here are the steps to guide you through the installation process:
Prepare the subfloor: Ensure that the subfloor is clean, level, and structurally sound. Repair any damage and make sure the surface is suitable for tile installation.
Measure and plan: Measure the dimensions of the shower area and select a tile-ready shower pan with a bench that fits properly. Consider the drain location and any necessary adjustments to the plumbing.
Dry-fit the shower pan: Place the tile-ready shower pan with the bench in the desired location to check its fit. Ensure that it aligns properly with the drain and make any necessary adjustments to the subfloor or the pan’s position.
Apply mortar: Remove the shower pan and apply a layer of mortar to the subfloor using a notched trowel. Spread the mortar evenly, creating ridges for better adhesion.
Place the shower pan: Carefully place the tile-ready shower pan with the bench onto the layer of mortar. Press down firmly to ensure proper adhesion. Use a rubber mallet to gently tap the pan to help it settle into the mortar.
Check for level and adjustments: Use a level to confirm that the shower pan with the bench is level. Make any necessary adjustments by adding or removing mortar as needed.
Connect the drain: Follow the manufacturer’s instructions to properly connect the drain to the shower pan. Ensure a watertight seal to prevent leaks.
Waterproofing: Apply a waterproofing membrane to the entire shower pan surface, including the bench area. Ensure that the membrane overlaps the edges of the pan and bench. Smooth out the membrane, removing any air bubbles or wrinkles.
Tile installation: Once the shower pan with the bench is in place and waterproofed, proceed with the tiling process. Install the tiles on the shower pan, bench, and walls, following proper tile installation techniques.
Grouting and sealing: After the tiles have been installed and set, apply grout to the joints. Allow the grout to dry, then clean off any excess. Seal the grout lines with a suitable grout sealer to prevent water penetration and maintain their appearance.
It is essential to follow the manufacturer’s instructions for the specific tile-ready shower pan with bench that you are installing
