If you own a printer, you probably know how important it is to clean the printer now and then. But if you don’t it can turn into a big problem where you will need to do the cleaning manually by taking out the inkjets and the printhead. So if you still have a warranty over your printer we don’t recommend cleaning it manually.
So if you want How To Clean Printer Heads manually you’ll need a cleaning kit and solution. Take out your printer head and inject a 5ml warm cleaning solution into the nozzles and keep a paper towel underneath to catch the ink. Then let the printer head dry and reinstall it in place.
But other possible ways can be used to clean a printhead more efficiently and in less time. If you want to know the other processes of cleaning then you must keep on reading.
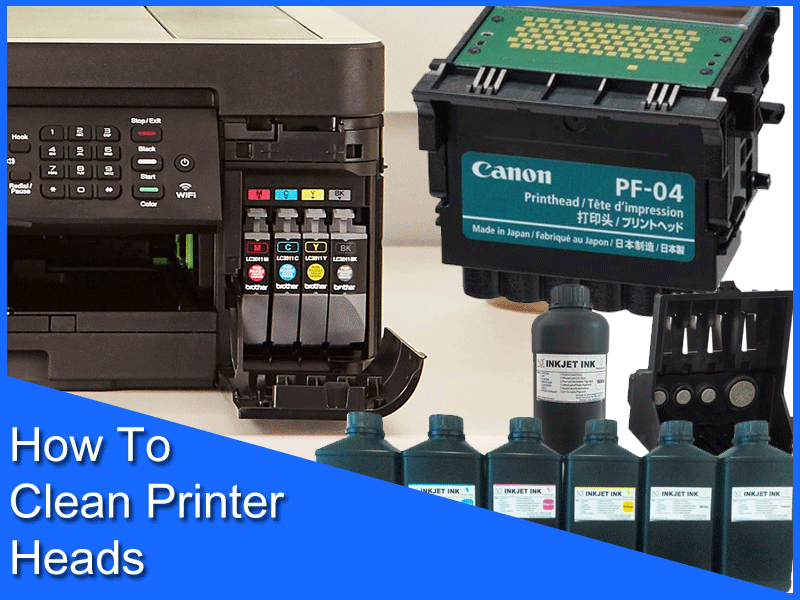
How To Clean Printer Heads
If you have sent a print job to your printer but no ink was applied to the paper or you got poor results. You may have one or more clogged print heads. This will usually show up as spotting ink on the page or a missing color. Even though the cartridge is full.
The cause of this problem is usually the printer is not used often, so the pigment dries up and clogs the heads. You can often avoid this situation by using your printer at least every few weeks.
Method 1
The first thing to try is to run the cleaning cycle in the printer’s utility software or directly from the printer’s control panel. This will force extra ink through the printer head to attempt to unclog them. For example, in canon models, there is a maintenance tab in the menu with an option for cleaning. Press the okay button to start the cleaning process, then print a page to see if the print quality improves.
Method 2
Most printers install a utility on your computer that can also run the cleaning process. The HP toolbox software for example has a printer services tab where you can select the option to clean the printheads and follow the- screen instructions.
Method 3
If the printer’s automatic cleaning process doesn’t do the trick you may want to try manually cleaning the print heads. It’s a good idea to wear rubber gloves to avoid getting ink on your hands. First, remove the cartridge from the printer. There are two different styles of print heads. For some models including many Epson and HP printers, the printer head is often integrated into the cartridge.
Some models such as those from Canon, have a separate printer head that can be removed. The cartridges themselves often have a sponge at the bottom and they should not be cleaned. Instead, remove and clean the printer head unit instead of the cartridge itself. You may need to remove all of the cartridges to access the printer head unit.
Mix isopropyl alcohol and water at about a 50/50 mixture in a small bowl or plate. It should be just enough to soak the print heads but just barely. If the printer head is integrated into your cartridge, soak the printhead portion of the cartridge in the alcohol and water solution. If the printer head is a separate piece, soak the printhead in the solution.
Either way, let the part soak for around 2 minutes. Fold a paper towel several times, pull the cartridge or printhead out of the solution and bad it against the paper towel until it is relatively dry. Change out the paper towel if it starts to become soaked with ink. Once the printhead or cartridge is dry, reinstall it into the printer and the cartridges as well and try a test print. If you are still having trouble you can try soaking the printhead longer; even overnight.
How To Clean Epson Printer Heads
To begin with, you need to start the machine to print. When it is actively printing remove the power cable from the rear of the machine this will free up the cartridge that holds the ink cartridge making it nice and easy to slide back and forth. Now remove all the cartridges and clean all of the print heads at the same time.
Tools
- Cleaning solution
- Blotting paper
- Bowl
- Hot water
- Scissor
- Syringe
Step 1
Firstly, you need to warm the liquid in a water bath with hot but not boiling water. Remove the cap during the hot water bath. Leave this for a couple of minutes. Cut two 20 millimeter trips from the booting paper.
Step 2
Take both strips of blotting paper together and slide them underneath the printheads. Make sure it is under and visible at the same time. With the syringe provided carefully measure out two to three milliliters of the warmed solution.
Step 3
Firmly and securely place the hose and syringe onto the printhead ensuring it is pressed down and is a tight fit. Leave the hose attached like this for about three to five minutes. After a few minutes slowly flush the syringe on the printhead with cleaning fluid. Do not force it.
Step 4
Carefully remove the hose making sure liquid doesn’t spill or spray out of it. You can slide the cartridge away and remove the ink cover blotting paper and dispose of it. Replace the ink cartridge and turn the printer back on.
How To Clean Hp Inkjet Printer Heads
To manually clean the removable printhead on an HP Inkjet Printer printer follow the instructions below:
Tools
- A disposable container
- Clean lint-free cloth
- Filtered or distilled hot water
- Disposable gloves
- Paper towels
Step 1: Prepare The Container
Stack tissue papers one-quarter of an inch deep at the bottom of the disposable container. Pour hot water into the container until it’s 2-inches deep and the paper towels are fully submerged.
Step 2: Remove The Ink Cartridges
Now remove all the inkjet cartridges. Keep the printer on and open the ink cartridge door. Wearing disposable gloves remove each cartridge by pressing the tab on the front or by pushing in on the cartridge to release it and then remove it from the printer. Place the cartridges upside down on a paper towel.
Step 3: Remove The Printhead
Lift the printhead latch and take it out of the printer. Dampen the clean lint-free cloth with the hot water without pressing into the nozzle area or forcing water into the printhead to wipe away any excess ink.
Step 4: Soak The Printhead
Soak the printhead in the prepared container. Place the printhead nozzles rest on top of the paper towels. Soak for 10 minutes and then remove the printhead and then set it on a paper towel with the nozzles facing up to dry for 15 minutes.
Step 5: Reinstall The Printhead And Cartridges
With the printhead dry, reinstall the printhead and cartridges, and then lower the latch to lock it in place. Reinstall each cartridge in its corresponding slots. Press down each cartridge until it clicks or snaps into place. With all cartridges in place, close the cartridge door.
How To Clean Printer Heads Brother
To maintain good print quality the machine automatically cleans the printhead when needed. If there is a print quality problem:
- Make sure your device is turned on. Then check if there are papers on the tray
- Press the power stop button and copy the shortcut button simultaneously
- The power, warning, and ink LED will light up for one second and then the ink LED will start to blink
- To clean black only press the start button once. After cleaning the machine check the print quality from the check sheet
- Then check and make sure that the BK dotted lines are all visible with no gaps
- To clean all four colors press the color start button once. check the print quality from the check sheet again
- Then check if the dotted line forming the four colors is all visible with no gap
How To Clean Printer Heads Canon
To clean Canon printer heads manually while the printhead is still inside the printer, you need a printer cleaner set suitable for the thermal print heads in combination with a little piece of plastic hose that is 4 millimeters. Open the front cover of your printer and hit on the button. The printed compartment slides into the middle parking position by opening the upper lid. In that position, unplug the printer.
This will allow you to slide the printhead compartment from side to side freely and it also prevents the printed compartment from going back to the parking position automatically. Now take a piece of kitchen towel and place it under the printhead compartment. Remove the inkjet cartridges.
Now take the little plastic hose and slide it on the import. Take some printhead cleaner on a syringe and push a small amount of cleaning fluid into the hose. Remove the hose from the key port and remove the towel as well. Lastly, reinstall all the pieces back in place.
How To Clean Canon Mx922 Print Head
If you are facing problems printing with your Canon MX922 then you can clean the print head using the following steps:
Step 1: Lift the top of the printer and your print head will be in the middle. Lift the printhead latch and take it out.
Step 2: Take a container and a cleaning syringe kit with a cleaning solution inside. Inject a small amount of product inside the nozzle. Let it sit for 15 minutes.
Step 3: Now take it out from the box and dry it with a paper towel. Once the printhead is clean assemble all the pieces back together in place.
FAQ
What Can You Use To Clean Printer Heads?
Hot water or a cleaning solution can be used to clean the printhead. But you need to warm the water or the solution. Also, make sure to purchase a pretty inexpensive cleaning kit.
How Do I Clean The Head On My Nozzle Printer?
Use the syringe and a plastic hose from the cleaning kit that is usually used for this type of cleaning. Take 5 ml of warm cleaning solution and slowly inject it onto the nozzles. Make sure you don’t push it hard or push any air inside the nozzle. Keep a paper towel underneath so it catches the ink underneath. Now let the solution work for 15 minutes and then pay it dry. Now you can reinstall it.
How Do I Get My Printer Head Clean Automatically?
To clean your printhead automatically go to the printer’s software and click on printing preferences. Now click on maintenance and you’ll see a head cleaning option. Click on that. Now let the software work. Now check the print nozzle and print on paper. From the print, you’ll be able to see the final results of auto clean.
You might also like
- How To Fill A Boiler System With Water
- Who Is Responsible For Power Line From Pole To House
- How To Get Hard Candy Out Of The Pan at Home
- How To Use Painters Putty
Final Verdict
So here we have mentioned all types of cleaning procedures for printheads and nozzles and also explained how you can check the outcome of your work. But you have to remember that there can be slight differences based on the printer model so you have to do more searching on the process and steps.