Installing solar umbrella lights is a fantastic way to add a touch of charm and illumination to your outdoor space. These lights are not only eco-friendly but also provide a soft and enchanting glow, perfect for creating a cozy ambiance during evenings or outdoor gatherings.
If you’re interested in installing solar umbrella lights, this short guide will walk you through the basic steps to get you started. With a few simple tools and a little bit of patience, you’ll have your solar umbrella lights up and shining in no time.
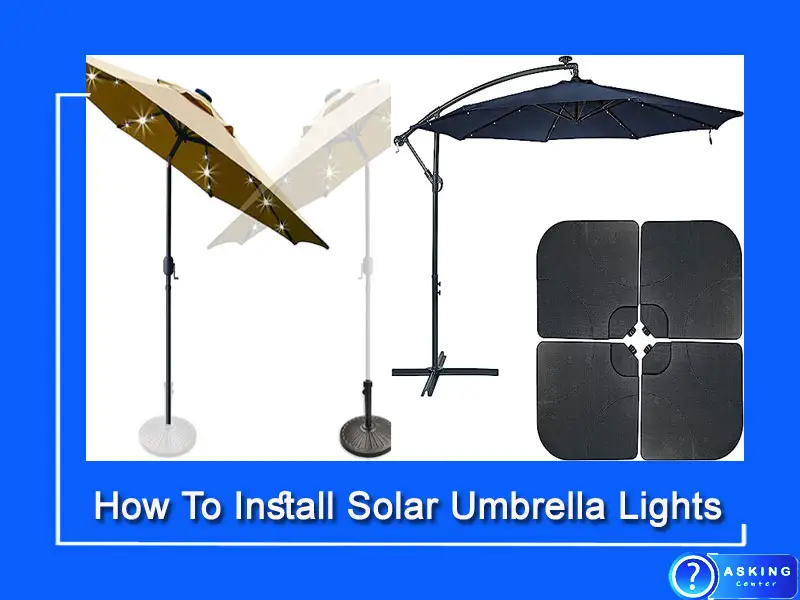
How To Install Solar Umbrella Lights
Follow these step-by-step instructions How To Install Solar Umbrella Lights and create a cozy and inviting atmosphere for your outdoor gatherings.
To install solar umbrella lights, you will need the following materials:
- Solar Umbrella Lights: Purchase a set of solar umbrella lights designed specifically for outdoor use. These lights typically come with a string of LED bulbs and a solar panel.
- Solar Panel: The solar panel is responsible for converting sunlight into electricity to power the lights. Ensure that the solar panel is compatible with the umbrella and has sufficient capacity to provide energy for the lights.
- Rechargeable Batteries: Solar umbrella lights often come with built-in rechargeable batteries. However, it’s a good idea to have extra rechargeable batteries on hand in case you need to replace them.
- Mounting Brackets or Clips: Depending on the design of your umbrella, you may need mounting brackets or clips to secure the solar panel to the umbrella frame. These will help keep the solar panel in place and ensure it receives adequate sunlight.
- Zip Ties or Velcro Straps: These are useful for securing the light strings along the umbrella’s spokes or frame. They help keep the lights in position and prevent them from tangling or getting damaged.
- Screwdriver or Drill: A screwdriver or drill may be required to attach the mounting brackets or clips to the umbrella frame, depending on the design.
- Outdoor Tape or Clips: If your umbrella does not have convenient attachment points for the light strings, you may need outdoor tape or clips to hold the lights in place along the umbrella’s edges.
- Step Ladder: Depending on the height of your umbrella, you may need a step ladder to reach the top and properly install the lights.
- Sunlight: Lastly, make sure you choose a location for your umbrella that receives ample sunlight during the day. This is crucial for the solar panel to charge effectively and provide sufficient power for the lights during the night.
By gathering these materials before starting the installation process, you’ll have everything you need to successfully install solar umbrella lights and enjoy their magical glow in your outdoor space..
Step 1: Choose The Right Location
Select a suitable location for your solar umbrella lights. Ensure that the area receives ample sunlight during the day to allow the solar panel to charge efficiently. Look for a spot near your outdoor seating area where the lights can provide optimal illumination.
Step 2: Gather The Required Materials
Collect all the materials mentioned in the previous section, including solar umbrella lights, a solar panel, rechargeable batteries, mounting brackets or clips, zip ties or Velcro straps, a screwdriver or drill, outdoor tape or clips, and a step ladder.
Step 3: Attach The Mounting Brackets or Clips
Check the design of your umbrella to determine the best method for attaching the solar panel. If the umbrella has a convenient attachment point, simply secure the mounting brackets or clips to the frame. Use a screwdriver or drill to fasten them securely in place. If the umbrella lacks attachment points, consider using outdoor tape or clips to affix the solar panel to the umbrella.
Step 4: Position the Solar Panel
Once the mounting brackets or clips are in place, position the solar panel on the umbrella frame. Ensure that it is aligned properly and facing upward to receive maximum sunlight. Use zip ties or Velcro straps to secure the solar panel firmly to the brackets or clips.
Step 5: Connect The Solar Panel to the Lights
Locate the connection point between the solar panel and the light strings. Most solar umbrella lights come with a detachable cable that connects the solar panel to the lights. Insert the plug into the corresponding socket, ensuring a secure connection.
Step 6: Test The Lights
Before proceeding further, it’s essential to test the lights. Switch them on and confirm that they illuminate properly. If the lights don’t turn on, check the connection between the solar panel and the lights and ensure that the solar panel is receiving sufficient sunlight.
Step 7: Attach The Light Strings
Starting from the top of the umbrella, begin attaching the light strings along the umbrella’s spokes or frame. Use zip ties or Velcro straps to secure the lights in place. Space the lights evenly, ensuring a balanced and aesthetically pleasing arrangement.
Step 8: Secure The Light Strings
To prevent the light strings from tangling or getting damaged, secure them along the umbrella’s edges using outdoor tape or clips. This will keep the lights in position, even in windy conditions.
Step 9: Adjust The Solar Panel Angle
To optimize the solar panel’s exposure to sunlight, adjust its angle if possible. Some solar panels come with an adjustable bracket that allows you to tilt the panel toward the sun. Find the optimal angle that maximizes sunlight absorption.
Step 10: Maintain and Enjoy
Regularly check the solar panel and lights for any debris or dirt that may hinder their performance. Clean them as needed to ensure they continue to charge effectively. During the day, the solar panel will absorb sunlight and charge the batteries. At night, the lights will automatically turn on and illuminate your outdoor space.
By following these step-by-step instructions, you can easily install solar umbrella lights and transform your outdoor area into a warm and inviting space. Enjoy the enchanting glow and eco-friendly benefits that solar umbrella lights bring to your outdoor gatherings and relaxation time.
How To Install Solar Umbrella Lights on Patio
Installing solar umbrella lights on your patio is a great way to add some extra light and ambiance during outdoor gatherings. These solar lights are easy to install with no wiring required. Simply mount the provided bracket onto your umbrella pole, place the light in the bracket, and secure it with the screws that come included.
Once mounted, you can easily adjust the angle of the light for maximum coverage. With their low-maintenance design, these lights will provide plenty of illumination throughout your evening soirees!
How Do You Attach Lights To A Patio Umbrella?
Attach lights to a patio umbrella by:
* Purchasing clip-on LED lights.
* Measuring and cutting the wires to size.
* Securing the clips onto the ribs of your umbrella.
* Plugging into an outlet or power source.
The installation is relatively simple and can be done in minutes, making it easy to enjoy a pleasant outdoor space at night!
Can You Add Solar Lights to Umbrella?
Yes, you can add solar lights to an umbrella.
Here are the steps:
1. Purchase a compatible solar light kit.
2. Carefully attach the light to your umbrella’s frame or canopy using zip ties or other fasteners; make sure it is secure and won’t move around in windy conditions.
3. Attach the battery pack (or multiple batteries) to the underside of your umbrella’s frame with adhesive tape or Velcro straps; this will keep them out of sight while still allowing access for recharging when necessary.
4. Place the solar panel in a sunny spot near your umbrella so that it can soak up enough sunlight during daylight hours for charging purposes at night time. make sure it is angled correctly towards direct sunlight for optimal efficiency!
With these easy steps, you’ll be able to enjoy outdoor entertaining even after dusk with beautiful ambient lighting from your newly-installed solar powered umbrellas!
How Do You Install Solar Panels on an Umbrella?
Installing a solar panel onto an umbrella requires some preparation.
Here’s how it can be done:
1. Gather necessary tools and materials: Solar panels, drill, screws, glue gun, or silicone caulk.
2. Measure the size of the umbrella to determine what size of solar panel will fit best and make sure there is enough space for all the components.
3. Mark where the holes should be drilled into the umbrella fabric with a marker or pen.
4. Drill holes for mounting brackets and attach them using screws or silicone caulk depending on whether you have metal or fabric material respectively.
Securely attach each bracket to its corresponding corner of the umbrella frame with bolts/nuts if applicable.
5. Place the solar panel in place on top of brackets and firmly secure it using additional hardware such as nuts/bolts if needed. Make sure that all connections are secure before testing out your new setup!
Why Are My Solar Lights on My Umbrella Not Working?
The solar lights on my umbrella are not working due to the following reasons:
• The battery could be dead and needs to be replaced.
• The switch may have been turned off.
• There might not be enough sunlight or shade for the sensor that turns them on.
• The wires connecting the solar panel to the light may have become disconnected or broken.
To determine why your solar lights are not working, you will need to troubleshoot each of these possible issues until you find a solution.
Conclusion
In conclusion, installing solar umbrella lights is a great way to brighten up any outdoor space. With their easy installation process and energy-saving benefits, these lights make for an excellent addition to any garden or patio area. Plus, the variety of styles available guarantees that you will find a set of lights that perfectly fits your needs.
Whether you want a soft glow for some evening ambiance or something more powerful for security purposes, solar umbrella lights are the perfect lighting solution!
Frequently Asked Questions (FAQs)
How do you set up a solar umbrella?
Follow these steps to get started:
Choose a suitable location: Select an outdoor area that receives ample sunlight throughout the day. This will ensure that the solar panel on the umbrella can charge effectively.
Open the umbrella: Extend the umbrella to its full open position, making sure it is securely locked in place.
Attach the solar panel: Depending on the design of your umbrella, there may be a specific attachment point for the solar panel. Use the provided mounting brackets or clips to secure the solar panel to the umbrella frame. Alternatively, you can use outdoor tape or clips if your umbrella doesn’t have dedicated attachment points.
Connect the solar panel to the lights: Locate the connection point between the solar panel and the lights. This is usually a detachable cable. Plug the cable into the corresponding socket on the solar panel, ensuring a secure connection.
Test the lights: Before finalizing the setup, switch on the lights and verify that they illuminate properly. If they don’t turn on, double-check the connection between the solar panel and the lights, and ensure the solar panel is receiving enough sunlight.
Adjust the angle: If possible, adjust the angle of the solar panel to optimize sunlight absorption. Some solar panels come with adjustable brackets that allow you to tilt the panel toward the sun. Find the optimal angle that maximizes sunlight exposure.
Enjoy your solar umbrella: Once the setup is complete, you can now enjoy the charming glow of your solar umbrella lights during the evenings and outdoor gatherings.
How do you attach lights to an umbrella?
Attaching lights to an umbrella can be done using the following steps:
Prepare the lights: Ensure that you have solar umbrella lights designed specifically for outdoor use. These lights typically come with a string of LED bulbs.
Open the umbrella: Fully extend the umbrella and lock it in place.
Attach the light strings: Starting from the top of the umbrella, carefully wrap or drape the light strings around the umbrella’s spokes or frame. Space the lights evenly to create a balanced and pleasing arrangement.
Secure the lights: Use zip ties or Velcro straps to secure the light strings to the umbrella. This will help prevent tangling and ensure the lights remain in place, even in windy conditions.
Adjust as needed: Take a step back and assess the overall appearance of the lights. Make any necessary adjustments to ensure they are evenly distributed and provide the desired illumination.
Test the lights: Before turning off any additional lighting, switch on the umbrella lights and verify that they illuminate correctly.
By following these steps, you can easily attach lights to your umbrella and create a magical ambiance for your outdoor space.
Can I add solar lights to my umbrella?
you can add solar lights to your umbrella.
Many umbrellas on the market today are designed with compatibility for solar lights in mind. Look for an umbrella that has attachment points or features specifically intended for installing solar lights.
These umbrellas often come with built-in mounting brackets or clips that make it easier to attach the solar panel to the umbrella frame.
If your existing umbrella doesn’t have dedicated attachment points, you can still add solar lights by using outdoor tape or clips to secure the solar panel to the umbrella.
Ensure that the solar panel is positioned to receive adequate sunlight for optimal charging.
Adding solar lights to your umbrella is a fantastic way to enhance your outdoor space with eco-friendly lighting, creating a warm and inviting atmosphere for your outdoor activities and gatherings.
How does a solar light umbrella work?
A solar light umbrella works by harnessing the energy of the sun to power its lights.
It typically consists of three main components: the solar panel, rechargeable batteries, and LED lights.
The solar panel, usually located on top of the umbrella, is responsible for capturing sunlight and converting it into electrical energy. It contains photovoltaic cells that generate a direct current (DC) when exposed to sunlight.
These cells are made of semiconductor materials that produce an electric current when photons from the sun’s rays strike them.
