Installing a Ring Floodlight Cam can be a great way to enhance the security of your home or business. This device combines a high-definition camera with bright floodlights to deter intruders and capture video footage of any activity in the area. While the installation process may seem daunting at first, it is actually fairly straightforward with the right tools and preparation. In this guide, we will provide step-by-step instructions on how to install a Ring Floodlight Cam to help you get started.
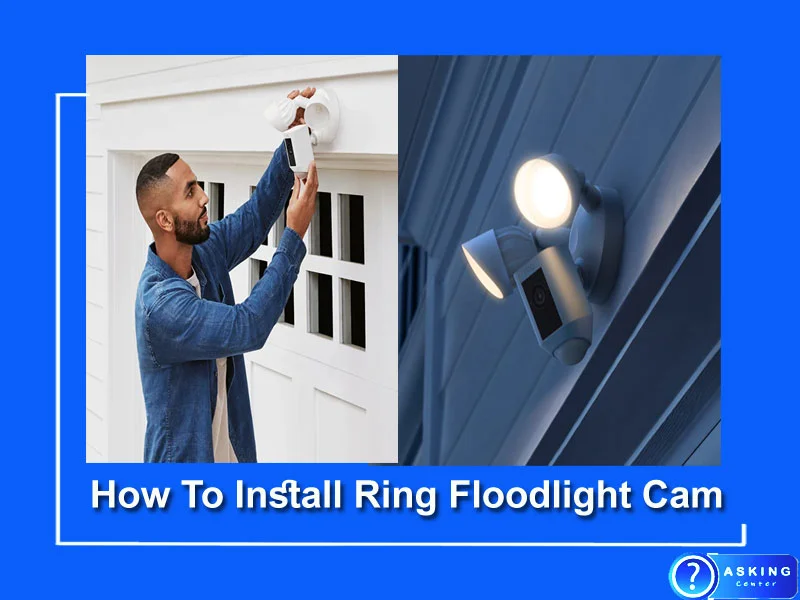
How To Install Ring Floodlight Cam (9 Easy Steps)
Installing a Ring Floodlight Cam is a relatively straightforward process, but it does require some basic electrical knowledge and DIY skills. With the right tools and preparation, you can have your Ring Floodlight Cam up and running in no time. Here’s a step-by-step guide on How To Install Ring Floodlight Cam.
Before you start installing your Ring Floodlight Cam, make sure you have the following materials on hand:
- Ring Floodlight Cam
- Phillips head screwdriver
- Drill
- Drill bit set (optional)
- Wire strippers
- Voltage tester (recommended)
- Electrical tape
- Wire connectors
- Ladder (if needed)
- Smartphone or tablet with the Ring app installed
- Wi-Fi network with a strong signal
- A helper (optional, but recommended for safety)
Having these materials ready will help ensure a smooth and successful installation process. It’s also important to read through the Ring Floodlight Cam user manual and installation guide before getting started, to familiarize yourself with the process and any safety precautions you need to take.
This article is a step-by-step detailed guide on how to install a Ring Floodlight Cam step by step:
Step 1: Choose the location for your Ring Floodlight Cam
Before you start installing your Ring Floodlight Cam, you need to choose the right location for it. Ideally, you want to place the camera in a spot that gives you a clear view of the area you want to monitor. You should also make sure that the camera is positioned high enough so that it’s out of reach of any potential intruders. It’s recommended that you install the camera at a height of at least nine feet.
Step 2: Turn off the power supply
Before you start working on the electrical wiring, you need to turn off the power supply to the area where you’re installing the Ring Floodlight Cam. You can do this by switching off the circuit breaker that controls the power to the area. Use a voltage tester to make sure that the power is off before you start working on the wiring.
Step 3: Install the mounting bracket
The next step is to install the mounting bracket for your Ring Floodlight Cam. The mounting bracket should be secured to a solid surface, such as a wall or a ceiling. Use the screws provided in the Ring Floodlight Cam kit to attach the bracket to the surface.
Step 4: Connect the wiring
Once you’ve installed the mounting bracket, it’s time to connect the wiring for your Ring Floodlight Cam. First, you need to strip the insulation off the ends of the wires, using wire strippers. Then, connect the black wire to the black wire in the electrical box, and the white wire to the white wire in the electrical box. If there’s a ground wire in the electrical box, connect it to the green wire on the Ring Floodlight Cam. Use wire connectors to secure the wires together.
Step 5: Mount the Ring Floodlight Cam
Now that you’ve connected the wiring, it’s time to mount the Ring Floodlight Cam onto the mounting bracket. Make sure that the camera is level and pointing in the direction you want it to face. Use the screws provided in the kit to secure the camera onto the bracket.
Step 6: Install the floodlights
The Ring Floodlight Cam comes with two floodlights that need to be installed. The floodlights should be attached to the bottom of the camera, using the screws provided. Make sure that the floodlights are securely attached and pointing in the direction you want them to face.
Step 7: Download and set up the Ring app
Before you can start using your Ring Floodlight Cam, you need to download the Ring app onto your smartphone or tablet. The Ring app is available for free on both the App Store and Google Play Store. Once you’ve downloaded the app, follow the on-screen instructions to create a Ring account and set up your Ring Floodlight Cam.
Step 8: Connect to Wi-Fi
Your Ring Floodlight Cam needs to be connected to a Wi-Fi network in order to function properly. Make sure that your Wi-Fi network has a strong signal in the area where you’ve installed the camera. Use the Ring app to connect your camera to your Wi-Fi network.
Step 9: Test your Ring Floodlight Cam
Once you’ve completed the installation process, it’s important to test your Ring Floodlight Cam to make sure that it’s working properly. Use the Ring app to view the live video feed from your camera and make sure that the floodlights are functioning correctly. You can also test the motion detection feature by walking in front of the camera
How To Install Ring Floodlight Cam Without Existing Wiring
If you want to install a Ring Floodlight Cam but don’t have existing wiring in the area where you want to place it, don’t worry! You can still install the camera using a plug-in adapter. Here’s a step-by-step guide on how to install a Ring Floodlight Cam without existing wiring.
Step 1: Choose the location for your Ring Floodlight Cam
As with the wired installation method, the first step is to choose the right location for your Ring Floodlight Cam. Make sure that the camera is positioned high enough so that it’s out of reach of any potential intruders. You should also make sure that the camera is pointing in the direction you want it to face.
Step 2: Purchase a plug-in adapter
To power your Ring Floodlight Cam without existing wiring, you’ll need to purchase a plug-in adapter. Ring offers a specific adapter that is compatible with the Floodlight Cam, but you can also purchase a compatible adapter from a third-party supplier. Make sure that the adapter you choose has an output of at least 18 volts.
Step 3: Mount the camera and floodlights
Once you have your plug-in adapter, it’s time to mount your Ring Floodlight Cam and floodlights. Follow the instructions in Step 3 and Step 6 of the wired installation method to mount the camera and floodlights onto the mounting bracket.
Step 4: Connect the plug-in adapter
Next, you need to connect the plug-in adapter to your Ring Floodlight Cam. Plug the adapter into an electrical outlet that is located within range of the camera. Then, connect the adapter cable to the camera’s power port.
Step 5: Download and set up the Ring app
Just like with the wired installation method, you need to download the Ring app onto your smartphone or tablet. Follow the on-screen instructions to create a Ring account and set up your Ring Floodlight Cam.
Step 6: Connect to Wi-Fi
Use the Ring app to connect your Ring Floodlight Cam to your Wi-Fi network. Make sure that your Wi-Fi network has a strong signal in the area where you’ve installed the camera.
Step 7: Test your Ring Floodlight Cam
Once you’ve completed the installation process, it’s important to test your Ring Floodlight Cam to make sure that it’s working properly. Use the Ring app to view the live video feed from your camera and make sure that the floodlights are functioning correctly. You can also test the motion detection feature by walking in front of the camera.
Installing a Ring Floodlight Cam without existing wiring is a great option for renters or for those who don’t want to hire an electrician to install the wiring. Just make sure that you purchase a compatible plug-in adapter and follow the instructions carefully to ensure a successful installation.
Conclusion
In conclusion, installing a Ring Floodlight Cam is a great way to enhance the security of your home. With the right tools and knowledge, you can easily install the camera yourself. If you have existing wiring in the area where you want to install the camera, simply follow the instructions provided by Ring to mount the camera and floodlights onto the mounting bracket and connect the wires. If you don’t have existing wiring, you can still install the camera using a plug-in adapter. Just make sure that you purchase a compatible adapter and follow the instructions provided by Ring carefully.
After installation, don’t forget to download the Ring app and set up your camera. This will allow you to view the live video feed from your camera, set up motion detection alerts, and adjust the camera settings to suit your needs. With your Ring Floodlight Cam installed and set up, you can rest assured that your home is well-protected against intruders and other potential security threats.