Installing a Nest Cam with floodlight can be a great way to enhance your home security system. Not only can you monitor your property with a high-quality camera, but the floodlight can also deter potential intruders. However, if you’re not familiar with the installation process, it can be a daunting task.
In this guide, we will walk you through the steps of installing a Nest Cam with floodlight, so you can have peace of mind knowing your home is well-protected. From gathering the necessary tools to mounting the camera and floodlight, we’ll cover everything you need to know to get your Nest Cam with floodlight up and running in no time. So, let’s get started!
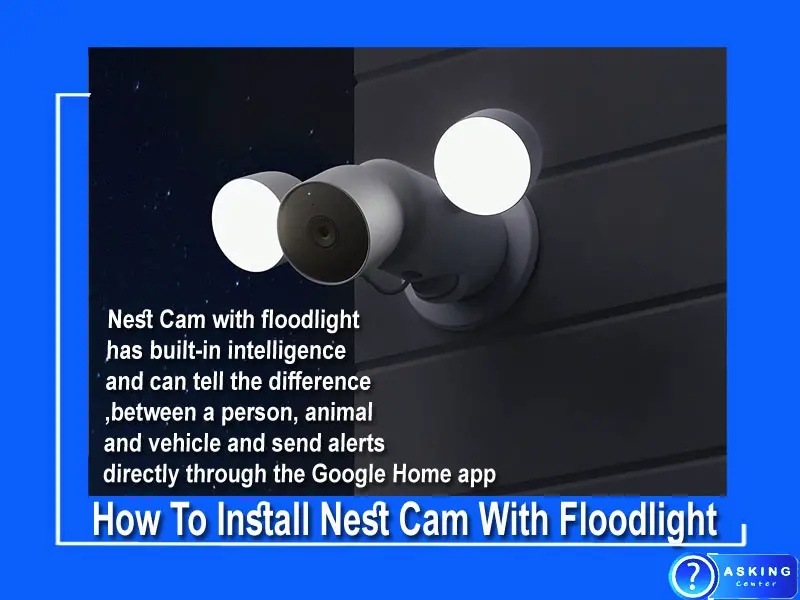
How To Install Nest Cam With Floodlight
Installing a Nest Cam with floodlight can be a great way to enhance your home security system. Here are the step-by-step How To Install Nest Cam With Floodlight:
To install a Nest Cam with floodlight, you will need the following materials:
- Nest Cam with floodlight: You will need to purchase the Nest Cam with floodlight before starting the installation process. Make sure you have the appropriate model for your home security needs.
- Mounting bracket: The mounting bracket is used to secure the Nest Cam with floodlight to the wall or ceiling. It usually comes included with the device.
- Screws and wall anchors: These are used to mount the bracket onto the wall or ceiling. Make sure the screws and anchors are appropriate for the type of surface you are mounting on.
- Drill and drill bits: You will need a drill to create holes for the screws and anchors. Make sure you have the appropriate size drill bit for the screws and anchors.
- Screwdriver: You will need a screwdriver to fasten the screws into the anchors.
- Electrical wiring: You will need to have electrical wiring in place to power the Nest Cam with floodlight. Make sure the wiring is appropriate for the device and is installed safely.
- Smartphone or tablet: You will need a smartphone or tablet with the Nest app installed to set up and configure your Nest Cam with floodlight.
Make sure you have all of these materials before beginning the installation process to ensure a smooth and successful installation.
Step 1: Gather the necessary tools and materials
Before you begin installing the Nest Cam with floodlight, you’ll need to gather all the necessary tools and materials. Make sure you have the Nest Cam with floodlight, mounting bracket, screws and wall anchors, drill and drill bits, screwdriver, electrical wiring, and a smartphone or tablet with the Nest app installed.
Step 2: Choose the installation location
Choose the installation location for your Nest Cam with floodlight. The location should have a good view of the area you want to monitor and have access to electrical wiring. Make sure the location is also accessible for maintenance or adjustments in the future.
Step 3: Mount the bracket
Mount the bracket onto the wall or ceiling using the screws and wall anchors provided with the device. Use a drill to create holes in the wall or ceiling for the screws and anchors, and then use a screwdriver to fasten the screws into the anchors. Make sure the bracket is level and securely attached to the surface.
Step 4: Connect the wiring
Connect the electrical wiring to the Nest Cam with the floodlight. Make sure you turn off the power to the area before working with the wiring. Connect the black wire to the black wire, the white wire to the white wire, and the green wire to the green wire. Follow the manufacturer’s instructions for your specific device for more detailed guidance on connecting the wiring.
Step 5: Install the Nest Cam with floodlight
Install the Nest Cam with floodlight onto the bracket. Slide the camera onto the bracket and use the provided screws to secure it in place. Make sure the camera is facing the desired direction and the wiring is not pinched or damaged during installation.
Step 6: Configure the Nest Cam with floodlight
Configure the Nest Cam with floodlight using the Nest app on your smartphone or tablet. Follow the instructions on the app to set up your device and customize your settings. You can adjust the camera’s field of view, motion detection settings, and notification preferences, among other features.
Step 7: Test the Nest Cam with floodlight
Test the Nest Cam with floodlight to make sure it’s working properly. Use the app to view the live feed from your camera and test the floodlight by turning it on and off. Walk around the monitored area to make sure the camera captures all necessary angles and the floodlight illuminates properly.
Step 8: Maintain and adjust the Nest Cam with floodlight
Maintain and adjust the Nest Cam with floodlight as needed. Regularly clean the camera lens and make sure the wiring is not damaged. Adjust the camera’s position or settings as needed to ensure it continues to monitor the desired area effectively.
In conclusion, installing a Nest Cam with floodlights can be a great way to enhance your home security system. With the right tools and materials, you can easily install and configure your device to monitor your property and keep your home safe. Follow these step-by-step instructions for a successful installation.
Nest Cam With Floodlight Mounting Options
The Nest Cam with Floodlight Mounting Options is a revolutionary security solution that offers enhanced protection for your property. It includes an integrated floodlight that can be activated remotely or on demand, and it also features motion detection technology to help detect any potential intruders. The mounting options include wall mount, ceiling mount, and eave mount, so you have the flexibility to install your camera wherever you need it most.
With this advanced system, you can stay safe knowing that your home is well-protected from any potential threats.
Nest Cam With Floodlight Manual
Nest Cam With Floodlight Manual is an essential guide that provides all the information needed to effectively install, use and troubleshoot the Nest Cam with Floodlight.
It covers topics such as choosing a location for installation, connecting the camera to your Wi-Fi network, setting up motion detection alerts and adjusting brightness settings. Additionally, it offers helpful tips on maintaining and caring for your Nest Cam so you can get years of reliable performance from this great product.
Nest Cam With Floodlight (Wired)
The Nest Cam with Floodlight is a great addition for homeowners looking to add additional security to their property. This device has an HD video camera and two powerful LED floodlights that can detect motion up to 25 feet away, allowing you to have peace of mind knowing your home is more secure than ever. The best part of this system is that it comes with free cloud storage so you can easily view recordings at any time.
With its easy setup and simple operation, the Nest Cam with Floodlight makes an excellent choice for anyone in need of extra surveillance around their home or business.
Nest Cam With Floodlight Horizontal Mount
The Nest Cam With Floodlight Horizontal Mount is a versatile security camera that provides a wide-angle view and improved night vision. It features an integrated floodlight to help deter intruders, as well as two-way audio so you can communicate with visitors from your mobile device.
This mount option allows for easy installation and positioning of the camera in a horizontal orientation, giving you more control over what you monitor and when.
The Nest Cam With Floodlight Horizontal Mount is an ideal choice for those looking for extra protection against potential home invaders or other unwanted guests.
Nest Cam With Floodlight Qr Code
The Nest Cam with Floodlight QR Code is a great way to add extra security and deter unwanted visitors. It uses built-in motion detection technology to detect any activity within its range, then illuminates the area with bright LED lights, while also broadcasting an audio warning.
Additionally, it has a unique QR code feature that allows your guests or delivery personnel to quickly gain access without needing a physical key.
With this device in place around your home you can rest assured knowing that you are always protected from suspicious activities.
Nest Cam Floodlight Settings
The Nest Cam Floodlight is a great way to provide extra security for your home. With the settings, you can customize how long you want the lights to stay on and when they should turn off. You can also set up motion zones so that only activity in specific areas triggers the floodlights.
The Nest app allows you to adjust these settings wherever you are, giving you peace of mind knowing your home is secure even when away!
How To Remove Nest Floodlight Mounting Plate
Removing the mounting plate from your Nest Floodlight is a simple process. First, you’ll need to turn off the power to the light by flipping its circuit breaker off. Then, remove any screws connecting the mounting plate to your wall and carefully pull it away from the wall.
Once you have successfully removed the mounting plate, make sure all wiring is properly disconnected before disposing of or recycling it.
Nest Floodlight Eave Mount
The Nest Floodlight Eave Mount is an easy-to-install mount designed to securely hold the Nest Floodlight Camera. It allows for a lightning-fast installation and provides a secure foundation that keeps your camera in place, even in windy conditions.
The mount features adjustable tilt and swivel capabilities so you can get the perfect angle on any scene or activity around your home.
With its weather-resistant construction, it’s sure to last through any season or climate condition.
What Are The Mounting Options for Nest Cam Floodlight?
Nest Cam floodlight offers multiple mounting options for easy installation.
• Wall mount: Nest Cam Outdoor can be mounted on a wall using the included wall plate and screws.
• Eave mount: Can be attached to an eave or soffit with the included adapter plate and screws.
• Overhead mount: The camera’s adjustable arm allows it to fit over most standard junction boxes, making it ideal for overhead mounting.
Additionally, there is also a free-standing base option that lets you place the camera wherever you need it without drilling holes into your home’s exterior walls or fascia board.
What Voltage is Nest Cam With Floodlight Wired?
Nest Cam with floodlight is wired at 120V. It includes the following components:
• Power adapter to plug into an outlet
• 16-24 AWG wire for connecting the power adapter to Nest Cam
• Mounting hardware for secure installation. Installing a Nest Cam with Floodlight requires knowledge and experience in handling electrical equipment properly and safely, as incorrect wiring can cause damage or harm.
Does Nest Floodlight Need a Switch?
Yes, the Nest floodlight needs a switch.
The switch is necessary for the following reasons:
• To provide power to the device
• To turn on/off the light manually
• To adjust settings and control brightness levels
Without a switch, the Nest floodlight won’t be able to function properly.
Conclusion
Installing a Nest Cam with Floodlight is easy and can be done in just a few simple steps. This blog post has provided detailed instructions on how to install your new security system, from attaching the camera to connecting it to Wi-Fi. With the added protection of floodlights, you will have peace of mind knowing that your home is secure and protected from any potential intruders.
Investing in this type of security system is an excellent way to protect yourself, family members and valuable possessions.
Frequently Asked Questions (FAQs)
How do you install a Nest Cam with floodlights?
Mount the bracket onto the wall or ceiling using the screws and wall anchors provided, connect the electrical wiring to the Nest Cam with floodlight, and install the device onto the bracket using the provided screws. Finally, configure the Nest Cam with floodlight using the Nest app on your smartphone or tablet and test the device to ensure it’s working properly.