Installing a Ring Doorbell Wired is a great way to enhance the security of your home. The process may seem daunting at first, but with the right tools and a bit of patience, it can be done easily. In this guide, we’ll walk you through the steps required to install a Ring Doorbell Wired, from setting up the device to mounting it on your front door. By following these steps, you can have a fully-functional Ring Doorbell Wired up and running in no time, and enjoy the peace of mind that comes with knowing you have an extra layer of security protecting your home. So let’s get started!
How To Install Ring Doorbell Wired | 7 Easy Steps
Installing a Ring Doorbell Wired is a great way to enhance the security of your home. With this device, you can monitor your front door and receive alerts whenever someone comes to your doorstep. In this article, we’ll walk you through the step-by-step process How To Install Ring Doorbell Wired.
Step 1: Gather Your Tools
Before you begin the installation process, you’ll need to gather a few tools:
- A drill with a 3/32 inch drill bit
- A Phillips-head screwdriver
- Wire strippers
- Wire connectors
- A level
Step 2: Turn Off the Power
Before you start drilling into your wall, it’s important to turn off the power to your existing doorbell. Locate your home’s circuit breaker box and flip the switch that controls the power to your doorbell. This will ensure that you don’t accidentally electrocute yourself during the installation process.
Step 3: Remove Your Existing Doorbell
If you have an existing doorbell, you’ll need to remove it before installing your Ring Doorbell Wired. Use your screwdriver to remove the screws holding the doorbell in place. Then, gently pull the doorbell off the wall and disconnect the wires.
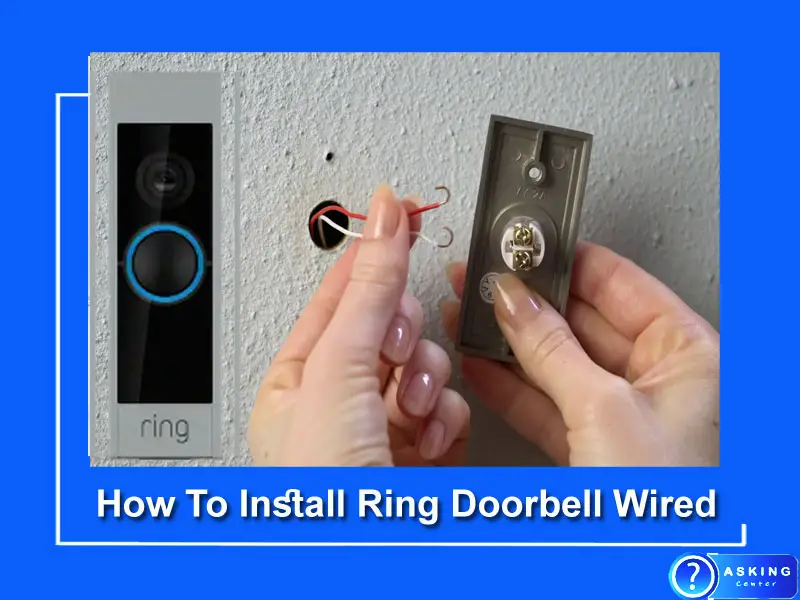
Step 4: Connect the Wires
Take the wires from your old doorbell and connect them to the wires on your Ring Doorbell Wired. Use wire connectors to secure the wires in place. Make sure you connect the wires correctly, following the instructions provided with your Ring Doorbell Wired. The device comes with clear and easy-to-follow instructions for wiring, which should help guide you through this step.
Step 5: Mount Your Ring Doorbell Wired
Now that your Ring Doorbell Wired is wired up, it’s time to mount it on your front door. Use the mounting bracket provided with the device to attach it to the wall. Make sure the bracket is level and use the included screws to secure it in place. Then, snap your Ring Doorbell Wired onto the bracket.
Step 6: Turn the Power Back On
Once your Ring Doorbell Wired is securely mounted, it’s time to turn the power back on. Head back to your circuit breaker box and flip the switch that controls the power to your doorbell.
Step 7: Sync Your Ring Doorbell Wired with the App
To start using your Ring Doorbell Wired, you’ll need to sync it with the Ring app on your smartphone. Open the app and follow the instructions provided to set up your device. Once your Ring Doorbell Wired is synced with the app, you’ll be able to receive alerts whenever someone comes to your front door.
In conclusion, installing a Ring Doorbell Wired is a straightforward process that can be done by anyone with a bit of DIY experience. With this device, you can enhance the security of your home and monitor your front door from anywhere. Just follow the steps outlined above, and you’ll have your Ring Doorbell Wired up and running in no time.
Do You Need An Electrician To Install A Wired Ring Doorbell?
Installing a Ring Doorbell Wired is a great way to enhance the security of your home, and it’s a project that many homeowners can tackle themselves. However, if you’re not comfortable working with electrical wiring, you may be wondering if you need to hire an electrician to install your Ring Doorbell Wired. In this article, we’ll explore whether or not you need an electrician to install a wired Ring doorbell.
Firstly, it’s important to note that installing a Ring Doorbell Wired does require some basic electrical knowledge. The device needs to be wired to your home’s existing doorbell wiring, which means you’ll need to be comfortable working with electrical wires. If you’re not comfortable with electrical work, it’s always a good idea to hire a professional to handle the installation.
That being said, if you have some basic electrical knowledge and feel comfortable working with wires, you may be able to install your Ring Doorbell Wired yourself. The device comes with clear and easy-to-follow instructions for wiring and installation, and there are also many video tutorials available online to guide you through the process.
Before you begin the installation process, it’s important to turn off the power to your existing doorbell. This ensures that you don’t accidentally electrocute yourself during the installation process. You’ll also need a few basic tools, including a drill with a 3/32 inch drill bit, a Phillips-head screwdriver, wire strippers, wire connectors, and a level.
Once you’ve wired up your Ring Doorbell Wired, it’s time to mount it on your front door. The device comes with a mounting bracket that you can attach to your wall using screws. Make sure the bracket is level before attaching your Ring Doorbell Wired to it.
Finally, to start using your Ring Doorbell Wired, you’ll need to sync it with the Ring app on your smartphone. This allows you to receive alerts whenever someone comes to your front door, and to monitor your front door from anywhere.
In conclusion, while installing a Ring Doorbell Wired does require some basic electrical knowledge, it’s a project that many homeowners can tackle themselves. If you’re not comfortable working with electrical wires, it’s always a good idea to hire a professional electrician to handle the installation. However, if you have some basic electrical knowledge and feel comfortable working with wires, you may be able to install your Ring Doorbell Wired yourself by following the device’s instructions and tutorials available online.
How To Install Ring Doorbell With Existing Doorbell
If you have an existing doorbell and you’re looking to upgrade to a Ring Doorbell, you’ll be happy to know that the installation process is quite straightforward. In this article, we’ll walk you through the step-by-step process of installing a Ring Doorbell with an existing doorbell.
Step 1: Check Your Existing Doorbell Compatibility
Before you start the installation process, it’s important to make sure that your existing doorbell is compatible with the Ring Doorbell. Most doorbells will work with the Ring Doorbell, but it’s always a good idea to double-check before you start. You can check the compatibility of your doorbell by visiting the Ring website or contacting Ring customer support.
Step 2: Gather Your Tools
Before you begin the installation process, you’ll need to gather a few tools:
- A drill with a 3/32 inch drill bit
- A Phillips-head screwdriver
- Wire strippers
- Wire connectors
- A level
Step 3: Turn Off the Power
Before you start drilling into your wall, it’s important to turn off the power to your existing doorbell. Locate your home’s circuit breaker box and flip the switch that controls the power to your doorbell. This will ensure that you don’t accidentally electrocute yourself during the installation process.
Step 4: Remove Your Existing Doorbell
Use your screwdriver to remove the screws holding the doorbell in place. Then, gently pull the doorbell off the wall and disconnect the wires. Be sure to label the wires so that you know which ones connect to your Ring Doorbell.
Step 5: Connect the Wires
Take the wires from your old doorbell and connect them to the wires on your Ring Doorbell. Use wire connectors to secure the wires.
How To Install Ring Doorbell Battery-powered
Ring doorbells are a popular home security device that allows you to monitor your front door and keep your home safe. If you have a battery-powered Ring doorbell, installing it is easy and can be done in just a few simple steps. In this article, we will guide you through the process of installing a Ring doorbell battery-powered.
Step 1: Charge the battery
The first step in installing a Ring doorbell battery-powered is to charge the battery. Remove the battery from the device and plug it into a charger. Allow it to charge fully before proceeding to the next step.
Step 2: Download the Ring app
The Ring app is available for both iOS and Android devices. Download the app and create an account if you do not already have one.
Step 3: Install the Ring doorbell
Before installing the doorbell, make sure you have the necessary tools, including a drill, screwdriver, and level. Follow these steps to install the doorbell:
- Remove the mounting bracket from the device and use it as a template to mark the location of the screw holes on your wall.
- Use a drill to make holes at the marked locations.
- Insert the screws into the holes and leave them slightly loose.
- Place the mounting bracket onto the screws and adjust it so that it is level.
- Tighten the screws to secure the bracket in place.
- Attach the Ring doorbell to the mounting bracket by sliding it down until it clicks into place.
Step 4: Set up the Ring doorbell in the app
Once the Ring doorbell is installed, you need to set it up in the app. Follow these steps:
- Open the Ring app and tap on “Set up a Device.”
- Select “Doorbells” and then select your Ring doorbell model.
- Follow the on-screen instructions to connect your Ring doorbell to your Wi-Fi network.
- Enter your Ring account information and follow the prompts to complete the setup process.
Step 5: Test the Ring doorbell
Finally, test your Ring doorbell to ensure it is working properly. Walk in front of the doorbell and check if you receive a notification on your phone or tablet. You should also test the two-way audio feature to ensure you can hear and speak to visitors at your door.
In conclusion, installing a Ring doorbell battery-powered is a straightforward process that can be completed in just a few steps. With the Ring app and a few tools, you can have your doorbell up and running in no time, providing you with the peace of mind that comes with knowing your home is protected.
Conclusion
In conclusion, installing a Ring Doorbell Wired is a relatively simple and straightforward process that can be completed with a few basic tools and some patience. The first step is to make sure you have the necessary tools and equipment to install the doorbell, such as a screwdriver, drill, and level. Once you have the tools, you can begin the installation process by wiring the doorbell to your existing doorbell system or installing a transformer if needed. Next, you need to attach the mounting bracket to your wall using the screws and anchors provided, making sure it is level before attaching the doorbell. Finally, you can set up the doorbell in the Ring app, test it to ensure it is working correctly, and enjoy the added security and convenience it provides. With these steps, you can easily install a Ring Doorbell Wired and improve the security of your home.
